This V2Ray one-click script supports IPv6-only servers, but it's not recommended to use an IPv6-only VPS for bypassing internet restrictions.
After completing the prerequisites, run the following command to install the V2Ray all-in-one script (copy and paste recommended):
bash <(curl -sL https://sunqi.org/v2ray.sh)
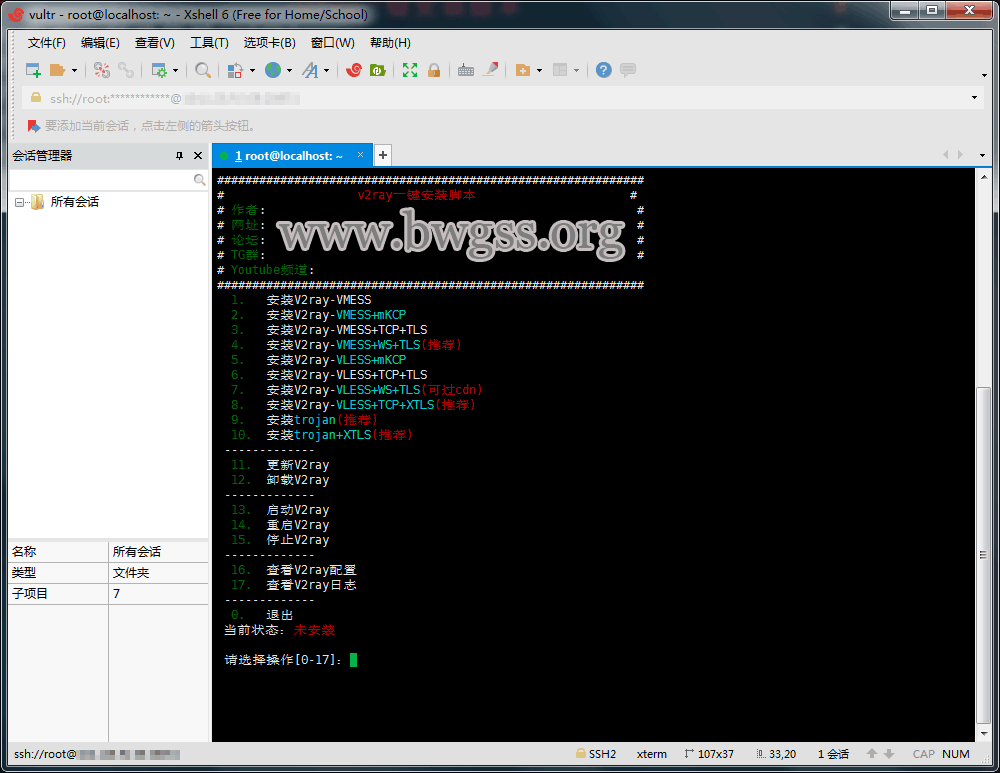
After pressing Enter, you'll see the following menu:
1. Install V2ray-VMESS
2. Install V2ray-VMESS+mKCP
3. Install V2ray-VMESS+TCP+TLS
4. Install V2ray-VMESS+WS+TLS (Recommended)
5. Install V2ray-VLESS+mKCP
6. Install V2ray-VLESS+TCP+TLS
7. Install V2ray-VLESS+WS+TLS (CDN compatible)
8. Install V2ray-VLESS+TCP+XTLS (Recommended)
9. Install trojan (Recommended)
10. Install trojan+XTLS (Recommended)
————-
11. Update V2ray
12. Uninstall V2ray
————-
13. Start V2ray
14. Restart V2ray
15. Stop V2ray
————-
16. View V2ray configuration
17. View V2ray logs
————-
0. Exit
If the menu doesn't appear after pressing Enter:
For CentOS systems, run:
yum install -y curl
For Ubuntu/Debian systems, run:
sudo apt install -y curl
Then run the installation command again.
Now choose according to your needs. For this tutorial, we'll select option "8" to install "V2ray-VLESS+TCP+XTLS".
After pressing Enter, you might see:
Before running the V2ray one-click script, please confirm the following:
1. A fake domain name
2. The fake domain's DNS resolves to the current server IP (192.168.0.1)
3. If you havev2ray.pemandv2ray.keycertificate files in/root, condition 2 can be ignoredPress y to confirm, any other key to exit:
Once you've confirmed the domain resolution or have the certificate files (trojan-go.pem and trojan-go.key in /root), press "y" to proceed with installation.
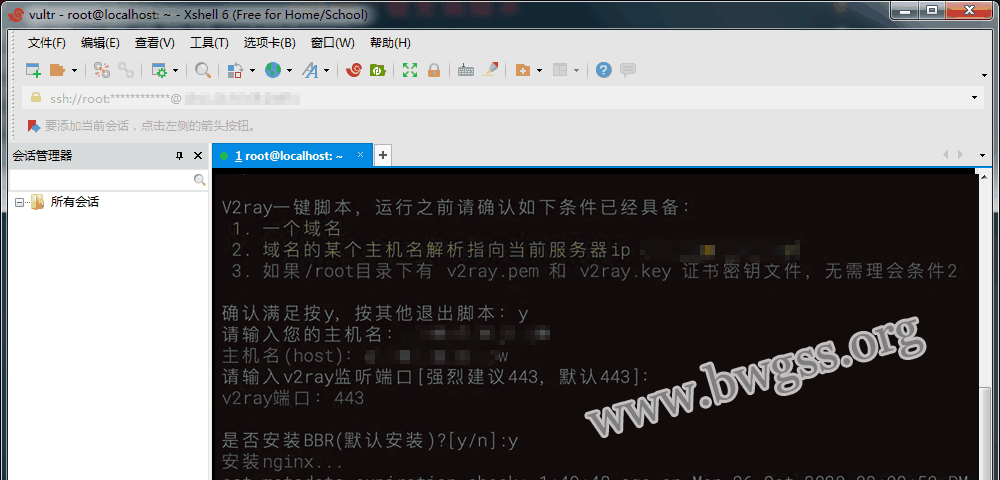
The installation process will then begin.
- During installation, you'll be prompted to enter some information (enter as needed, or press Enter to use defaults).
- Please be patient during the script installation. If the screen freezes, do nothing as long as the SSH connection remains active.
- If the SSH connection drops, simply re-run the installation command to continue.
Once the script finishes, you'll see the following information screen:
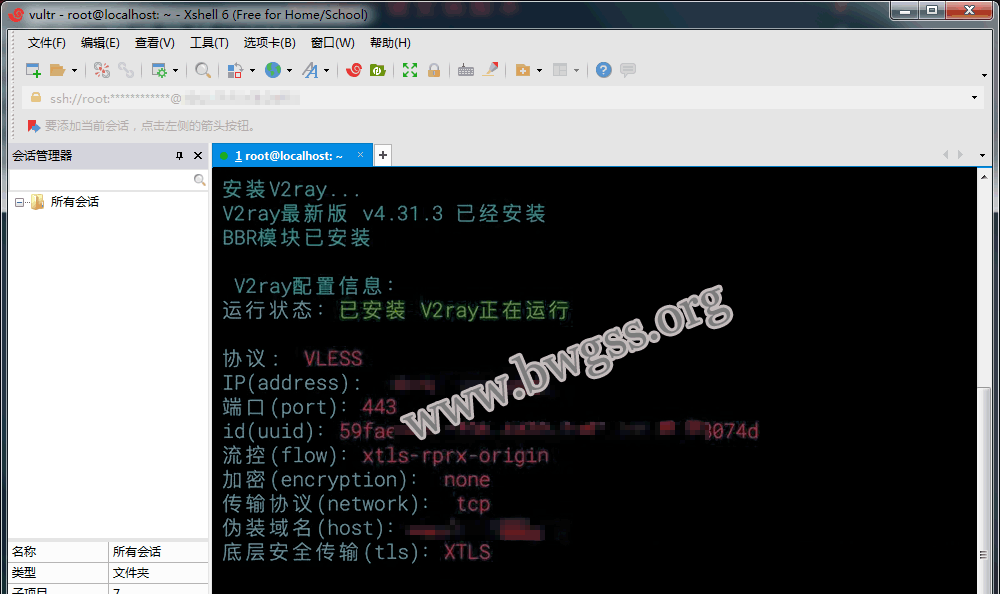
V2Ray is now installed. The SSH window will display the configuration details:
- Protocol
- IP (address)
- Port
- ID (UUID)
- Flow control
- Encryption
- Transport protocol (network)
- Fake domain (host)
- TLS
Your V2Ray all-in-one one-click installation is now complete.
After installation, the VPS may or may not reboot automatically — this is normal.
If you installed the VLESS or VMESS+WS+TLS combination, open your browser and enter your fake domain. If the fake website loads correctly, the server is configured properly.
V2Ray One-Click Script Notes
- If you plan to use a CDN like CloudFlare for proxying, you must install the WS version of the V2Ray script.
- This V2Ray one-click script includes BBR acceleration by default — no need to install it separately.
- If the script doesn't include a fake website you like, you can set up your own WordPress blog. See: V2ray Fake Website Tutorial.
- For TLS-based installations, the script automatically obtains domain certificates, stored in the same folder as the V2Ray config file (
/etc/v2ray). Certificates auto-renew. If your client suddenly stops working, check if the fake website loads. If the certificate has expired, re-run the script to reconfigure. - Avoid using excessive traffic immediately after setting up V2Ray, as this may lead to VPS throttling, port blocking, or even IP blacklisting.

Comments